
Supported devices: PowerPDU 4C
How does it work
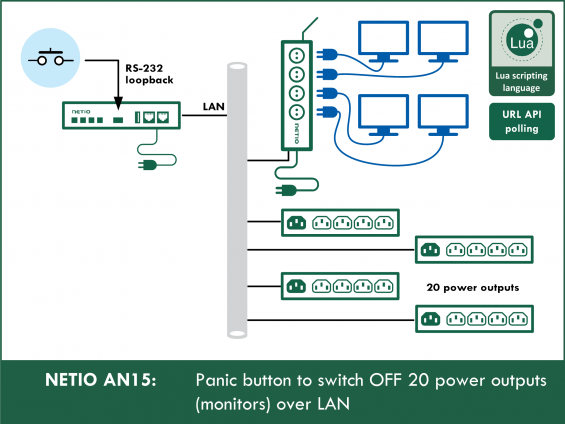
AN26 detects the flipping of a switch that is connected to the serial line as a “Loopback” (between the Rx and Tx pins).
The AN26 example consists of 3 scripts. The first script (Send message over serial port) periodically sends a message over the serial line. The second script (Receive message and save timestamp) stores the timestamp when the last message was received over the serial line (i.e. detects if the central switch is in the “on” position). The third script (Send URL commands) runs periodically and every 5 seconds sends a URL command to the specified IP addresses to set the outputs to the desired states. The third script therefore determines the desired states according to the state of the central switch and then sends the corresponding URL commands.
Configuring the serial port of PowerPDU 4C
In the web interface, go to M2M API Protocols - Serial Port, select Use in Actions (Lua scripts), and set the Block delimiter to CR+LF (0xd,0xa should automatically appear in the field on the right). Click Save Changes to save the settings.

After that, Status changes to Connected and a green dot appears next to the Serial Console tab.

Configuring the URL API at the controlled NETIO devices
The script (Send URL commands) periodically sends a command over the URL API protocol to set the states of individual outputs. The controlled devices must have the URL API protocol enabled in order to receive the commands that control their outputs.
URL API needs to be enabled at every NETIO device to be controlled with the central switch. In the web interface, go to M2M API Protocols – URL API, check Enable URL API and set a Passphrase (this Passphrase will be entered in the script). Click Save Changes to save the changes.

After saving the changes, the device restarts itself. After the restart, a green dot should appear next to the URL API tab, indicating that the protocol is active.

Creating the rule
To create and run Lua scripts, go to the Actions section in the NETIO 4 web administration interface and click Create Rule to add a rule. Then, set the parameters and paste the script (see below).

Script 1 – Send message over serial port
Runs continuously and sends data to the serial port. That is all it does.
1) Fill in the following parameters:
- Enabled: checked
- Name: Send message (Tx) (user-defined)
- Description: Send message over Serial Port (user-defined)
- Trigger: System started up
- Schedule: Always
2) Copy the following code and paste it into the field for the Lua script:
local period = 500

local function sendUart()
  devices.system.SerialWrite{id="uart",message="\r\n"}
  milliDelay(period,function() sendUart() end)
end

sendUart()
3) To finish creating the rule, click Create Rule at the bottom of the screen.

Script 2 – Receive message and save timestamp
Runs continuously and evaluates data received over the serial port (detects the “on” or “off” state of the central switch).
1) Fill in the following parameters:
- Enabled: checked
- Name: Receive message (Rx) (user-defined)
- Description: Receive message over Serial Port (user-defined)
- Trigger: Serial packet received
- Schedule: Always
2) Copy the following code and paste it into the field for the Lua script:
 local stringTime = os.date("%X")
_G.timeStamp = (3600*tonumber(stringTime:sub(1,2)) + 60*tonumber(stringTime:sub(4,5)) + tonumber(stringTime:sub(7,8)))
3) To finish creating the rule, click Create Rule at the bottom of the screen.

Script 3 – Send URL commands
1) Fill in the following parameters:
- Enabled: checked
- Name: Send command (user-defined)
- Description: Send command to all NETIOs devices (user-defined)
- Trigger: System started up
- Schedule: Always
2) Copy the following code and paste it into the field for the Lua script:
------------AN15 Script 3 - Send URL commands / Section 1------------
-- IP, passphrase, ActionON, ActionOFF
local IPs = {
"192.168.101.172", "netio-psw", "1511", "0500",
"192.168.101.155", "netio12345", "1151", "0050",
"192.168.101.131", "24A42C390D7C", "1115", "0005",
"192.168.101.28", "helloWorld123", "0011", "1100",
"192.168.101.220", "noIdea42", "1111", "0000"
}
---------End of Section 1---------

_G.timeStamp = 0
local stringTime = os.date("%X")
local currentTime = (3600*tonumber(stringTime:sub(1,2)) + 60*tonumber(stringTime:sub(4,5)) + tonumber(stringTime:sub(7,8)))


function checkRespond()
  stringTime = os.date("%X")
  currentTime = (3600*tonumber(stringTime:sub(1,2)) + 60*tonumber(stringTime:sub(4,5)) + tonumber(stringTime:sub(7,8)))
  if (currentTime - _G.timeStamp) <= 1 then
    for i=1,#IPs,4 do
      local actionON = IPs[i+2]
      local urlCommandON = "http://".. IPs[i] .."/netio.cgi?pass=" .. IPs[i+1] .. "&output1=" .. actionON:sub(1,1) .. "&output2=" .. actionON:sub(2,2) .. "&output3=" .. actionON:sub(3,3) .. "&output4=" .. actionON:sub(4,4)
      devices.system.CustomCGI{url=urlCommandON}
    end
  else
    for i=1,#IPs,4 do
      local actionOFF = IPs[i+3]
      local urlCommandOFF = "http://".. IPs[i] .."/netio.cgi?pass=" .. IPs[i+1] .. "&output1=" .. actionOFF:sub(1,1) .. "&output2=" .. actionOFF:sub(2,2) .. "&output3=" .. actionOFF:sub(3,3) .. "&output4=" .. actionOFF:sub(4,4)
      devices.system.CustomCGI{url=urlCommandOFF}
    end
  end
  delay(1,function() checkRespond() end)
end

checkRespond()
3) To finish creating the rule, click Create Rule at the bottom of the screen.

Setting the variables
- Section 1 of the third script (Send command) contains the IPs variable. This variable specifies the IP addresses of NETIO devices to control with the central switch, including the desired states of their outputs
-
IPs
- The variable contains an array of strings. Therefore, individual elements need to be in double quotes and separated with commas (there is no comma after the last string).
- For each IP address, 4 parameters are needed: IP address, passphrase for its URL API, output states when the switch is on (ActionON), and output states when it is off (ActionOFF).
- These parameters are in double quotes and separated with commas.
-
IP adresa
- IP address of the NETIO device to control
-
Passphrase
- Password for the URL API of the device (see Configuring the URL API at the controlled NETIO devices)
-
ActionON
- Desired states for the controlled NETIO device outputs when the switch is in the “on” position.
- The string consists of 4 numbers (one for each output).
- 0 - output switched off
- 1 - output switched on
- 5 - output state unchanged
-
ActionOFF
- Desired states for the controlled NETIO device outputs when the switch is in the “off” position.
- The string consists of 4 numbers (one for each output).
- 0 - output switched off
- 1 - output switched on
- 5 - output state unchanged
- Example of controlling two NETIO devices:
- The first IP address (192.168.1.1) has the passphrase netio-psw1. When the switch is on, all its outputs should be switched on, too. When the switch is off, all outputs should be switched off as well.
- The second IP address (192.168.1.2) has the passphrase netio-psw2. When the switch is on, outputs 1 and 2 should be switched off and outputs 3 and 4 should remain unchanged. When the switch is off, outputs 1 and 2 should be switched on and outputs 3 and 4 should be again unchanged.
-- IP, password, Action ON, Action OFF)
local IPs = {
"192.168.1.1", "netio-psw1", "1111", "0000",
"192.168.1.2", "netio-psw2", "0055", "1155"
}
Starting the script
- After saving all scripts and activating the serial line, simply restart your NETIO device and all scripts start to run.
FAQ:
1) The outputs are set repeatedly every second. How can I change this period?
Near the end of the third script (Send URL commands), find the following line:
delay(1,function() checkRespond() end)
Here the repetition period for setting the outputs can be changed (the default is 1 second). Simply change the number in the delay function (specifies the period in seconds). It must be an integer (NETIO Lua does not support decimal numbers).
2) When an output is switched at the controlled device (e.g. with the button at the device), after a while it is switched back to the state determined by the central switch. Is it possible to prevent that?
No, the script periodically sets the outputs according to the IPs variable. When the action 5 is specified for an output, it can be controlled freely. However, in that case it is not controlled by the central switch.
3) Is it possible to use a NETIO PowerCable REST as the controlled device?
Yes, the output of a PowerCable REST can be controlled with URL API. Just as with NETIO 4 or 4All smart socket devices, simply enable its URL API and specify its IP address and Passphrase in the IPs variable. Since the PowerCable features only one output, only the first value in ActionON and ActionOFF is relevant. We recommend to set the remaining values to 5. Example:
local IPs = {
"192.168.1.1", "PowerCablePsw", "1555", "0555"
}
Supported FW versions:
3.0.0 and higher (Archiv firmware)
This Application Note is compatible with:

|
NETIO PowerPDU 4CNETIO PowerPDU 4C is a small 110/230V PDU (Power Distribution Unit). Each of the four IEC-320 C13 outlets can be independently controlled (On / Off / Reset / Toggle). Electrical parameters (A, W, kWh, TPF, V, Hz) are measured with high accuracy at each outlet. The device features two LAN ports (and a built-in Ethernet switch) for connecting to a LAN. Each power output supports ZCS (Zero Current Switching) to protect the connected equipment. |