
About PRTG
PRTG monitoring system monitors devices at all 7 ISO/OSI layers.
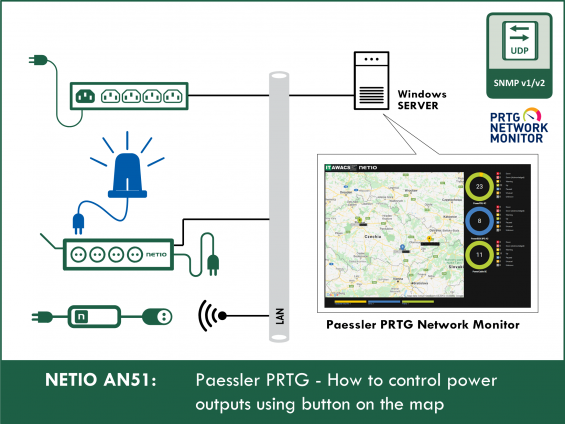
Different protocols can be used. In this Application Note, SNMP and XML are used for monitoring and URL API is used for control.
SNMP Monitoring
For SNMP monitoring, firmware with SNMP support is required. At the M2M API Protocols -> SNMP tab, check “Enable SNMP”. Select port 161 and version 1,2c. Community can be left at “public”. Click “Save Changes” to confirm the changes.
In PRTG, open the Devices tab and create a new device. Enter its IP address in the settings. Then, add a sensor. From the list of available ones, select “SNMP Custom Sensor”. Give the sensor a name and enter a valid OID. For PowerPDU 4C, these are the following:
1.3.6.1.4.1.47952.1.1.1.2.x Name of output X
1.3.6.1.4.1.47952.1.1.1.3.x State of output X
1.3.6.1.4.1.47952.1.1.1.25.x Load at output X
1.3.6.1.4.1.47952.1.1.1.26.x Energy consumed at output X
1.3.6.1.4.1.47952.1.1.1.27.x Start time for energy consumption measurement at output X
1.3.6.1.4.1.47952.1.1.1.28.x Current drawn at output X
1.3.6.1.4.1.47952.1.1.1.29.x Power factor at output X
1.3.6.1.4.1.47952.1.2.1 Input voltage
1.3.6.1.4.1.47952.1.2.2 Frequency
1.3.6.1.4.1.47952.1.2.3 Input current
1.3.6.1.4.1.47952.1.2.6 Total consumption

XML monitoring
For devices without SNMP support, PRTG can use XML over HTTP.
XML API support needs to be enabled in the NETIO power socked device over the web interface. At the M2M API Protocols -> XML API tab, check “Enable XML API” and leave the default port 80. Check Enable READ-WRITE and enter the Username and Password. Click “Save Changes” to save the changes. At the bottom of the page, there is a link to the netio.xml file, which contains information about what can be monitored over XML.
In PRTG, create a new device and add a “HTTP XML/REST Value” sensor.
As the URL, enter “/netio.xml”, or the full URL such as “http://device-IP/netio.xml”.
In the XML Node field, enter the sensor to monitor (State, PowerFactor, Load, Current, Energy, Name, TotalCurrent, TotalLoad, TotalEnergy).
When monitoring devices with multiple outputs, the output number is selected in the XML Node field. For example, to monitor output 3: “Output[3]/State”
In the HTTP Username and Password fields, enter the credentials configured in the NETIO device settings.
Configuration example:

Creating a map
To create a map with the devices, the map editor integrated in PRTG is used. Different types of objects can be added to the map to visualize their states. To do that, select an icon from the right panel and assign a sensor to it. It is possible to show graphs, sensor states, device states, and so on. Custom icons can be created in PRTG, too.
Map editor example:

Map example:

![]()
Controlling a device from the map:
In order to control a device from the map, scripts need to be added to PRTG.
Downloading the control scripts:
- From the NETIO server NETIO-AN51_DohledSnadno-PRTG-mapControl.zip
- The IT AWACS SOLUTION s.r.o. company, specializing in monitoring with PRTG (in Czech): http://www.dohledsnadno.cz/tipy-a-navody/
In PRTG, place the scripts to the following folder: “C:\Program Files (x86)\PRTG Network Monitor\webroot\mapobjects\”. After that, they appear in the right panel in the map editor (sometimes it is necessary to restart PRTG). After adding, the control URL is entered into the “HTML before” field and the button text is entered into the “HTML after” field.
For the control, the URL API protocol is used, and needs to be set for each button.

When the button is invoked, a confirmation dialog pops up.

The NETIO device must support control with URL links.
Enable it in at the M2M API Protocols -> URL API tab in the NETIO web configuration. For secure operation, we recommend using HTTPS.
For modifying link parameters, see AN19 .
Together with other PRTG functions, the result may look like this:

Video tutorial
FAQ
Control from the PRTG map doesn’t work.
Some browsers block JavaScript, try to enable JavaScript manually. In recent Chrome versions, the page may be sometimes considered dangerous; simply enable it in the page settings.
Make sure that the link is correct (try opening it in a browser, it should show “OK”).
I need to create a more complex installation based on PRTG, can someone help me?
If you need to control NETIO devices and other equipment from a map, contact IT AWACS SOLUTIONS s.r.o (www.itawacs.cz).
Who is IT AWACS SOLUTION s.r.o.?
IT AWACS SOLUTION s.r.o. is a System Integrator providing solutions for demanding enterprise customers. The company specializes in projects that require the integration of various monitoring and management technologies from different providers into a single Network Management System.
IT AWACS SOLUTION can provide a complete turnkey solution including SLAs for monitoring and management services, as well as installation and configuration at the premises and training inhouse operators and administrators.