
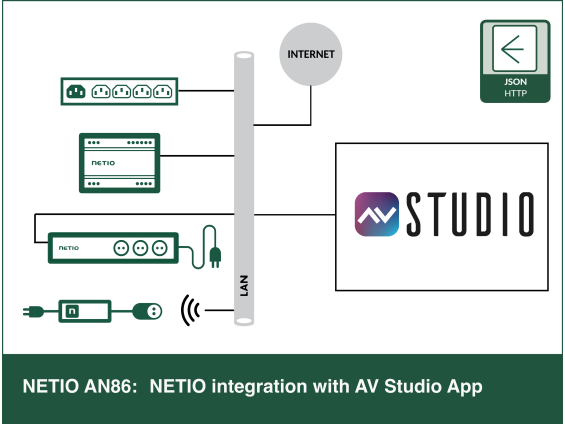
AVstudio is a modern HTML5-based GUI editor that allows integrators to create high-end, responsive control interfaces for iOS, Android, and web browsers. By using the JSON API protocol, NETIO devices can be seamlessly integrated into AVstudio projects, providing one-button control (ON/OFF/Restart) and real-time power monitoring without the need for a dedicated central hardware controller.
Integration highlights
- No Central Controller Required: AVstudio can communicate directly with NETIO PDUs via LAN/Wi-Fi using the JSON API.
- Native Mobile Experience: Control power from any Android or iOS device using the AVstudio App Container.
- Customizable UI: Design bespoke dashboards with "One-button" actions for Power ON / OFF / RESTART.
- Multi-Platform Ready: Supports integration alongside Crestron, AMX, other are coming
- Remote Reboot – Restart "frozen" AV equipment (projectors, players) directly from the maintenance tablet.
- Power Sequence – Program a "System Start" button in AVstudio that turns on equipment in a specific order to avoid power surges.
- Energy Dashboard -Display live consumption (Watts) for the entire rack to monitor system health. Monitor output states and power consumption data directly on the touch panel.
Support devices:
- NETIO: All devices running with min FW 4.0.5+; there could be functionals limitation observed by not using the latest FW

Configuration of NETIO device within AV Studio App enviroment
The integration relies on the NETIO JSON API (over HTTP/HTTPS). AVstudio uses its built-in JSON Datasource and HTTP request capabilities to send commands to the PDU and receive status updates.
Preparing the NETIO Device
- Log in to the NETIO device web interface.
- Go to M2M API Protocols >> JSON API.
- Enable the protocol and set Enable READ-WRITE.
- Configure a Username and Password for the API (e.g.,
netio/netio). - Save changes
Configuring AVstudio
- Go to https://editor.avstudio.app/#/login and logIn into AV Studio Editor
- Create a Datasource: In the AVstudio Editor, add a new JSON Datasource pointing to the NETIO device's IP address (e.g.,
http://192.168.1.100/netio.json). - Mapping Actions: Use the Visual Editor to create buttons. Assign an HTTP POST action to the button to trigger the
Controlcommand (e.g.,{"Outputs":[{"ID":1,"Action":1}]}to turn on Output 1). - Binding Feedback: Bind the "State" value from the JSON response to a toggle switch or status indicator to see real-time power status.
- Editor Tutorials & Configuration details available at https://www.youtube.com/@AVstudioApp
Special thanks
Let us thank especially Igor Murzakov from AV Studio for the module development. We are excited to have such partner as AV Studio.
FAQs
- Does Module support multiple devices connection? Yes. Importing the module for each PDU provides support for multiple units.
- Is a driver working with https? No, current plug in driver does not support Https
- Is communication drive by “event” or by “time”. What is data read out frequency? - The module gets both the JSON response to a command and issues a get request every 2 seconds
- Does module support NETIO nBus functionality No, currently not – it will be introduce in additional module release